BUILDING A TERRACED GARDEN
TIPS FOR RESTORATION OF A GARDEN
PART 1 OF 2 PARTS
Building a terraced garden is actually a tricky project if you don’t do it right. You could end up with all your bricks at the bottom of the garden In order to avoid this problem you can follow along and see how I did it.
The materials you will need for this project are:
- Crush gravel used for the base of the blocks
- Drain rock for carrying water away
- “Big O” pipe to distribute water
- Drain fabric to prevent silt from entering “Big O” pipe
- Top soil to fill your new levels
Experience invaluable
Like I said in my blog on “Gardening in Merritt”
I do not profess to be an expert in this field. The blog is featured on the Experience Nicola Valley website where it is operated by Tourism Nicola Valley. The product was developed by Eh!Canada Travel to provide revolutionary marketing for communities and businesses.
Bring in a professional
Therefore due to the complexity of the project I have hired a very experienced contractor who knows the ins and outs of building brick walls. In fact, he is one who prefers to over build and therefore you will be able to build even higher walls. Just remember if your plan is for a wall over 4 feet, you will need to get a permit from the City and the wall would have to have an engineer’s approval.
|
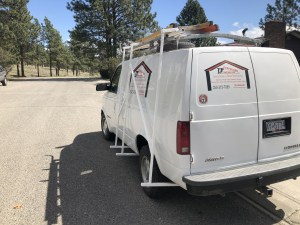
Our Contractor’s vehicle |
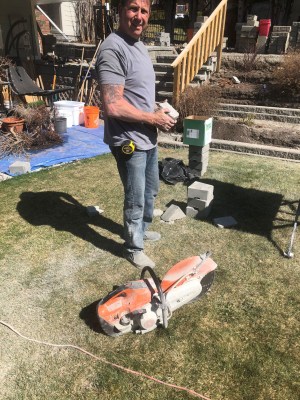
Our Contractor-Ted Cederland |
Let the Fun Begin in Building a Terraced Garden
This project had its beginnings in Facebook’s Market Place where my wife spotted a deal on bricks. The deal was so smoking hot that it was worth our while to make two trips to Kamloops to bring them home. However, it was too late in the year to start so we waited until this Spring.
We came up with our ideas, had our contractor in place and were ready to begin. Our starting point was the original wood terrace garden. The logs have been in place for at least 25 Years and when you step on them they disintegrate.
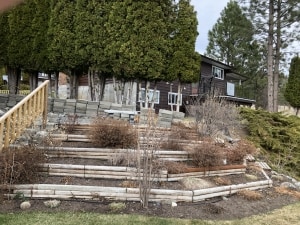
Demolition Day for Building a Terraced Garden
The first thing we had to do was remove all the rotten logs and remove the plants that would be in the way of the new wall. In retrospect, we should have removed all the plants because we were going from 4 levels to two levels and thus some of the plants would be too low and would have to be moved later. Anyway we ended up with our plant ICU.
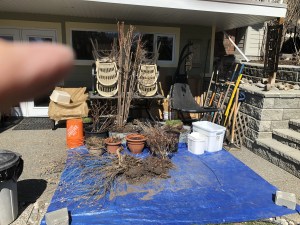
Setting the stage for the first row in Building your Terraced Garden
The first row of any wall is the most important because if you don’t get this right your entire wall will be compromised. So for this row you will need the following tools:
- A Flat Head Shovel
- A Regular Shovel
- A Tamper
- A Level
- A Rubber Mallet
- A Wheel Barrow
- Concrete Saw
Your first trench has to be deep enough to allow for your gravel base and your first layer of bricks, Keep in mind that this layer has to be level or all your other rows will be out of whack. For example, if your first row is off by one inch by the time you get to the fourth row the error will be very noticeable.
You use the flat head shovel to dig your trench. Not only do you want to make sure the trench is deep enough, you need to have enough width to receive the brick. In other words, we had 8″ bricks so our trench was 12″.
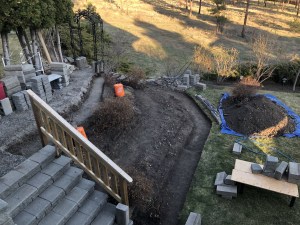
Subsequent Rows in Building a Terraced Garden
Once the first trench is in you need to use the tamper to pound the bottom of the trench so it is nice and firm so that you will avoid shifting later on. Once this is done you add about 2″ of crushed rock to the bottom of the trench, which you need to tamp the rock and make sure the trench is still level.
You are now ready for the exciting part of the project, the laying of the blocks for your first row. Lay your first blocks in place and use the rubber mallet to tap it in place so that the block is nice and firm. Check that it is level and then place the next one. Tap it in place with the mallet and make sure it abuts tightly with the first block and that it is level.
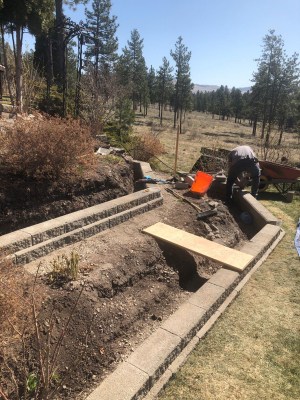
Sorry. You will Have to Waite To Finish Building a Terraced Garden
At the beginning of this blog I mentioned the great deal we got on the blocks from Kamloops. What we didn’t think about was what would happen if we did not have enough. With out checking we assumed that we could run down to the Home Hardware Store and pick up our shortfall. However, what we didn’t think about was that a product made in 1970 may not be available in 2021?
As a result you will have to stay tuned as I will hopefully have a resolution to this problem in the next couple of weeks and we will be able to show you the results.
***
Award Winning Nicola Valley Travel and Tourism Guides
 |
 |

|
“Experience Community Program” is a small and rural community authentic content marketing program. It is a product of the EH? Canada Marketing Group
Comments
There are no reviews yet. Be the first one to write one.


